步驟真的是多如牛毛,為了怕以後自己會忘記,所以乾脆摘要在此。首先,是整個步驟的摘要:
- 選用Google Cloud的虛擬機,在這裡我們選用CentOS 6.7
- 使用SSH連線進入虛擬機之後,先執行update
- 安裝 Apache2
- 安裝 MySQL (CentOS7請安裝mariadb)
- 安裝 PHP以及所有相關的程式庫
- 安裝FFMPEG
- 安裝FLVtool2
- 安裝MP4Box
- 安裝PHPShield
- 安裝ImageMagick
- 下載ClipBucket,並安裝
- 設定ClipBucket
執行Update的指令:
[code]
$sudo yum -y update
[/code]
安裝Apache2 + PHP + MySQL以及一些必要的指令(CentOS 7請把mysql和mysql-server改為mariadb, mariadb-server):
[code]
$sudo yum -y install httpd http-devel php php-mysql php-gd php-devel php-pear mysql mysql-server flvtool2 zlib-devel mplayer mod_flvx svn
[/code]
啟動MySQL和Apache2的服務:
[code]
$ sudo chkconfig mysqld on
$ sudo chkconfig httpd on
$ sudo service mysqld start
Initializing MySQL database: Installing MySQL system tables…
OK
Filling help tables…
OK
To start mysqld at boot time you have to copy
support-files/mysql.server to the right place for your system
PLEASE REMEMBER TO SET A PASSWORD FOR THE MySQL root USER !
To do so, start the server, then issue the following commands:
/usr/bin/mysqladmin -u root password ‘new-password’
/usr/bin/mysqladmin -u root -h centos6clipbucket password ‘new-password’
Alternatively you can run:
/usr/bin/mysql_secure_installation
which will also give you the option of removing the test
databases and anonymous user created by default. This is
strongly recommended for production servers.
See the manual for more instructions.
You can start the MySQL daemon with:
cd /usr ; /usr/bin/mysqld_safe &
You can test the MySQL daemon with mysql-test-run.pl
cd /usr/mysql-test ; perl mysql-test-run.pl
Please report any problems with the /usr/bin/mysqlbug script!
[ OK ]
Starting mysqld: [ OK ]
$ sudo service httpd start
Starting httpd: [ OK ]
[/code]
再來先設定MySQL管理者的密碼,執行mysql_secure_installation即可,如下:
[code]
$ mysql_secure_installation
NOTE: RUNNING ALL PARTS OF THIS SCRIPT IS RECOMMENDED FOR ALL MySQL
SERVERS IN PRODUCTION USE! PLEASE READ EACH STEP CAREFULLY!
In order to log into MySQL to secure it, we’ll need the current
password for the root user. If you’ve just installed MySQL, and
you haven’t set the root password yet, the password will be blank,
so you should just press enter here.
Enter current password for root (enter for none):
OK, successfully used password, moving on…
Setting the root password ensures that nobody can log into the MySQL
root user without the proper authorisation.
Set root password? [Y/n]
New password:
Re-enter new password:
Password updated successfully!
Reloading privilege tables..
… Success!
By default, a MySQL installation has an anonymous user, allowing anyone
to log into MySQL without having to have a user account created for
them. This is intended only for testing, and to make the installation
go a bit smoother. You should remove them before moving into a
production environment.
Remove anonymous users? [Y/n]
… Success!
Normally, root should only be allowed to connect from ‘localhost’. This
ensures that someone cannot guess at the root password from the network.
Disallow root login remotely? [Y/n]
… Success!
By default, MySQL comes with a database named ‘test’ that anyone can
access. This is also intended only for testing, and should be removed
before moving into a production environment.
Remove test database and access to it? [Y/n]
– Dropping test database…
… Success!
– Removing privileges on test database…
… Success!
Reloading the privilege tables will ensure that all changes made so far
will take effect immediately.
Reload privilege tables now? [Y/n]
… Success!
Cleaning up…
All done! If you’ve completed all of the above steps, your MySQL
installation should now be secure.
Thanks for using MySQL!
[/code]
上述的步驟,是讓你可以先設定管理者的密碼,並把一些開始的無用設定都先移除。因為MySQL剛裝好時的root密碼是空白的,所以第一個問題要直接先按下Enter,再輸入你要設定的root密碼。有了這個密碼,我們就可以透過mysql介面來建立一個要給ClipBucket使用的資料庫了。不過在此之前,我們要先來安裝FFMPEG。安裝FFMPEG請參考本文:先試試這篇【在CentOS7安裝FFMPEG】,不行再試這篇:【安裝ClipBucket使用的FFMPEG】,或是這篇【更新:CentOS安裝ffmpeg方法】。但是有一點要特別注意的是,其中所有的過程中只要遇到make install指令的,別忘了在前面加上sudo,成為sudo make install,才不會發生FFMPEG無法順利編譯安裝的問題。如果正確安裝的話,在Shell中執行ffmpeg,看起來應該像是下面這個樣子:
[code]
$ ffmpeg
ffmpeg version git-2015-09-03-d1bdaf3 Copyright (c) 2000-2015 the FFmpeg developers built with gcc 4.4.7 (GCC) 20120313 (Red Hat 4.4.7-16) configuration: –prefix=/home/skynet_tw/ffmpeg_build –extra-cflags=-I/home/skynet_tw/ffmpeg_build/include –extra-ldflags=-L/home/skynet_tw/ffmpeg_build/lib –bindir=/home/skynet_tw/bin –pkg-config-flags=–static –enable-gpl –enable-nonfree –enable-libfdk-aac –enable-libfreetype –enable-libmp3lame –enable-libopus –enable-libvorbis –enable-libvpx –enable-libx264 –enable-libx265 libavutil 54. 31.100 / 54. 31.100 libavcodec 56. 60.100 / 56. 60.100 libavformat 56. 40.101 / 56. 40.101 libavdevice 56. 4.100 / 56. 4.100 libavfilter 5. 40.101 / 5. 40.101 libswscale 3. 1.101 / 3. 1.101 libswresample 1. 2.101 / 1. 2.101 libpostproc 53. 3.100 / 53. 3.100Hyper fast Audio and Video encoderusage: ffmpeg [options] [[infile options] -i infile]… {[outfile options] outfile}…Use -h to get full help or, even better, run ‘man ffmpeg’
[/code]
安裝FLVtool2,也只是一行指令即可:
[code]
$ sudo yum -y install flvtool2
[/code]
安裝MP4Box以及ImageMagick則稍微麻煩一些,請參考這兩篇文章:【安裝MP4Box】、【安裝ImageMagick】。還有,PHPShield也別忘了,我們整理在這一篇文章中【安裝PHPShield】。
接下來,請回到你的目錄【cd ~】,執行下列指令下載ClipBucket(如果網址不能使用,請前往ClipBucket官網找到下載的檔案位置)並以unzip指令解壓縮在您的目錄之下(ClipBucket有更新版了,下載網址:https://sourceforge.net/projects/clipbucket/files/ClipBucket%20v2/clipbucket-2.8.v3354-stable.zip):
[code]
$ wget http://clip-bucket.com/files/downloads/2015/07/clipbucket-2-7-6-v3249-stable-2015-07-30.zip
$ unzip clipbucket-2-7-6-v3249-stable-2015-07-30.zip
[/code]
然後,請進入該目錄下,利以下指令把目錄複製到/var/www/html之下,並設定適當的權限:
[code]
$ sudo cp -rf upload/* /var/www/html
$ sudo cp upload/.htaccess /var/www/html
$ cd /var/www
$ sudo chown -R apache:apache *
$ sudo chmod 777 includes
$ sudo chmod 777 files
$ sudo chmod 777 files/conversion_queue
$ sudo chmod 777 files/logs
$ sudo chmod 777 files/original
$ sudo chmod 777 files/temp
$ sudo chmod 777 files/thumbs
$ sudo chmod 777 files/photos
$ sudo chmod 777 files/videos
$ sudo chmod 777 files/mass_uploads
$ sudo chmod 777 files/temp/install.me
$ sudo chmod 777 images
$ sudo chmod 777 images/avatars
$ sudo chmod 777 images/backgrounds
$ sudo chmod 777 images/collection_thumbs
$ sudo chmod 777 images/category_thumbs
$ sudo chmod 777 images/groups_thumbs
$ sudo chmod 777 includes/langs/en.lang
$ sudo chmod 777 cache
$ sudo chmod 777 cache/comments
$ sudo chmod 777 cache/userfeeds
$ sudo chmod 777 cb_install
[/code]
還有,使用sudo vim /etc/php.ini 開啟php.ini設定檔,修正下列的內容:
[code]
max_execution_time = 300
max_input_time = 600
memory_limit = 512M
post_max_size =1024M
upload_max_filesize=1024M
max_execution_time=8400
short_open_tag = On
date.timezone = "Asia/Taipei"
[/code]
當然,你之前安裝的Imagick以及PHPShield之後,也別忘了這兩行:
[code]
extension=imagick.so
extension=ixed.5.3.lin
[/code]
修正完畢需要重新啟動httpd伺服器才行:
$ sudo service httpd restart
完成上述的準備動作,接下來就是要建立一個讓ClipBucket可以使用的資料庫。只要使用mysql文字列模式即可完成。請執行以下的指令即可:
[code]
$ mysql -uroot -pxxxxxxxx
mysql>CREATE DATABASE cbdatabase;
mysql>GRANT ALL PRIVILEGES ON cbdatabase.* TO "cbadmin"@"localhost" IDENTIFIED BY ‘xxxxxxxx’;
mysql>flush privileges;
mysql>exit
[/code]
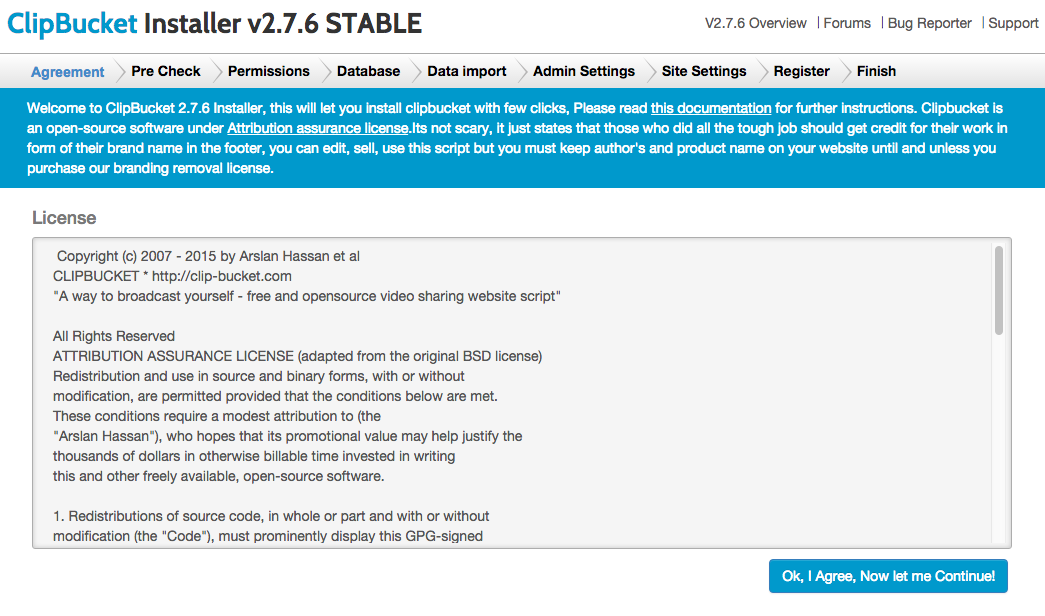
上述的指令,我們建立了資料庫叫做cbdatabase,並授權一個使用者cbadmin來操作。再來就是開始安裝程式的介面了。瀏覽我們網站的網址,第一個畫面如下(如果你發現License下面的文字內容是空白,而且也沒有Next的按鈕的話,請到php.ini中把short_open_tag打開就可以囉):
按下右下角的下一步按鈕,開始進行模組的檢查。
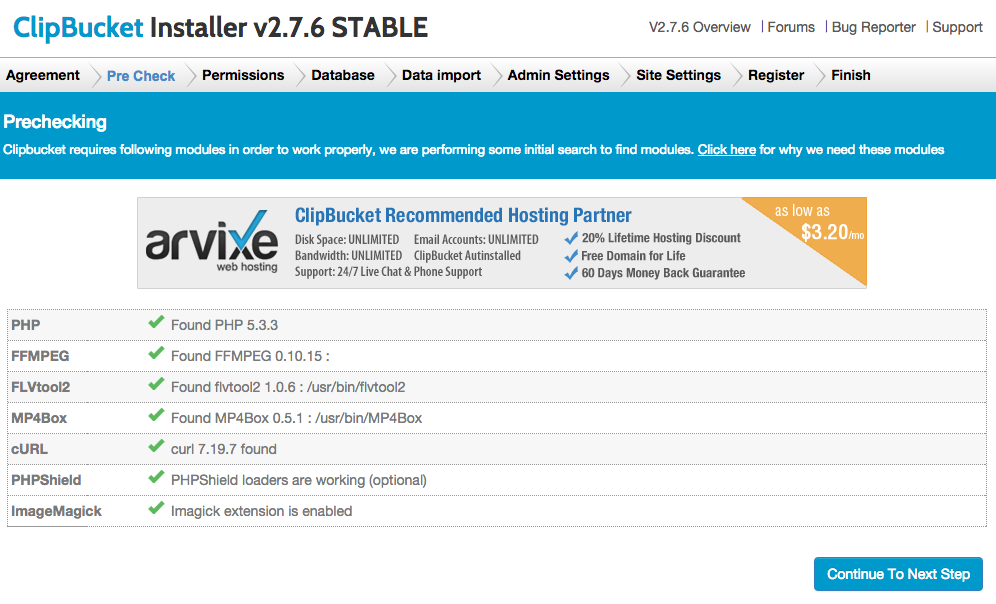
要確定所有的模組都是可勾狀態再進入下一步:
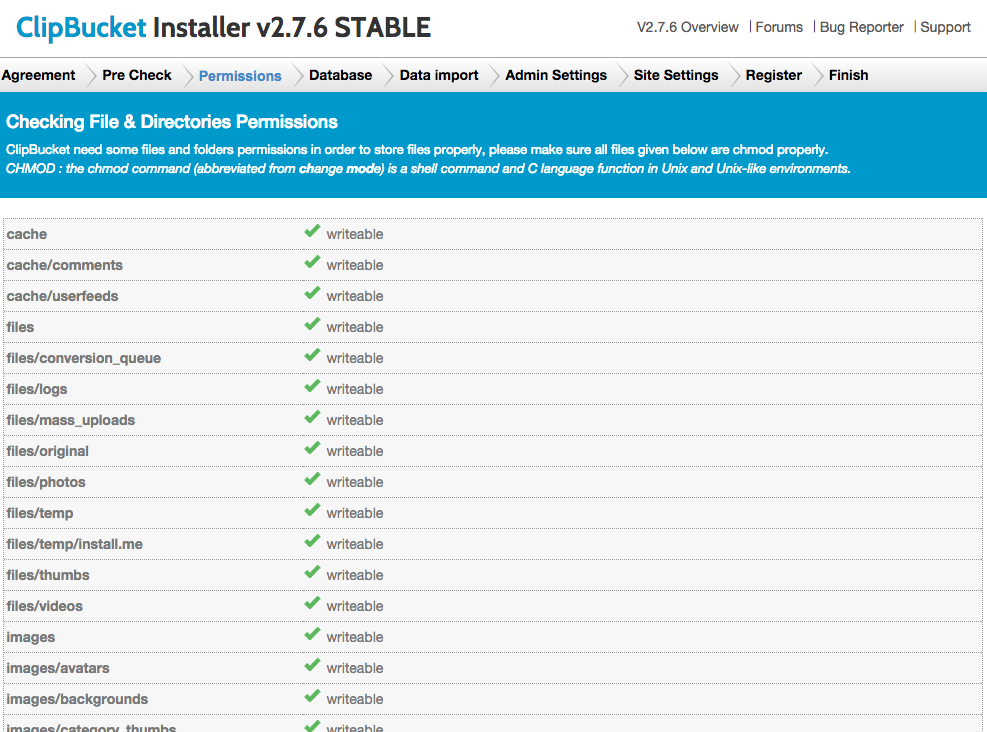
在這個畫面會檢查所有需要設定的目錄寫入權限是否正確。然後是要設定資料庫的連接:
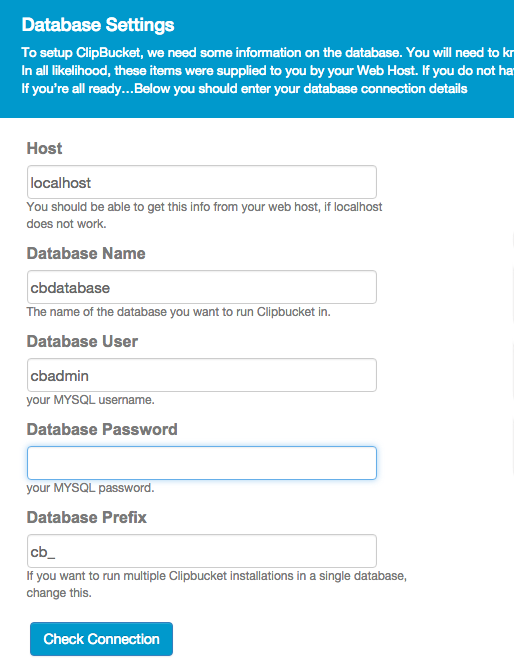
就依照我們之前的設定全部輸入進去即可。連接正確之後,下一步是要建立管理者帳號和密碼:
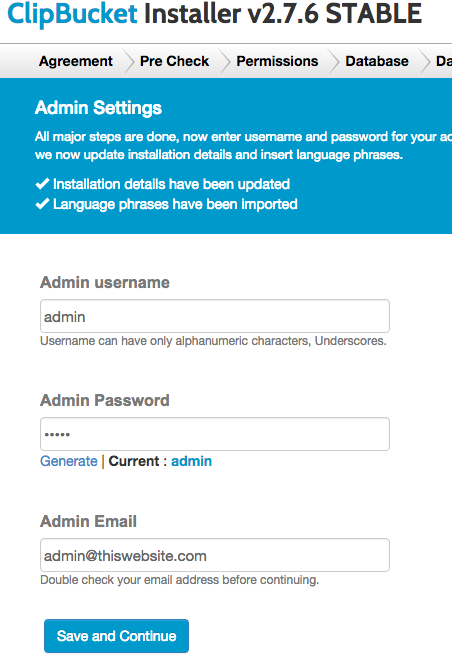
習慣上我們都是使用admin當做是管理者帳號,當然你也可以選擇別的,但是別設定完就忘了就好。再往下一步:
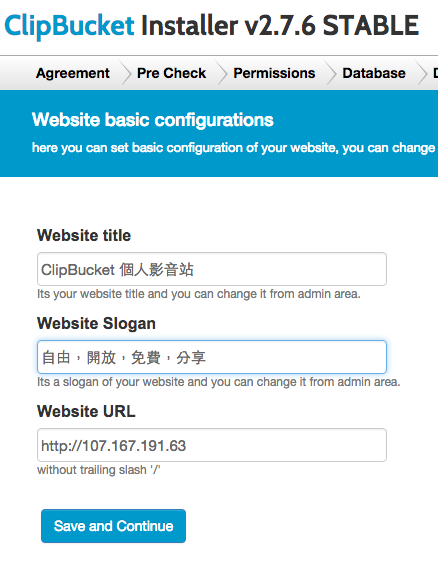
在這裡設定站台名稱以及網址。網址當然是要設定成目前這個位址才行。其實到這邊大概就算是完成安裝了。下一步就要問你要不要註冊了:

註冊的事,以後再說。選擇左側的按鈕進入下一步:
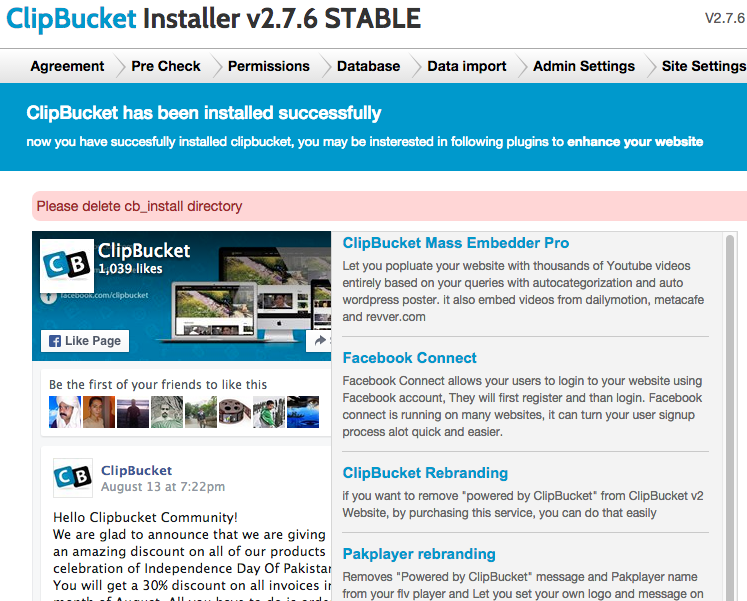
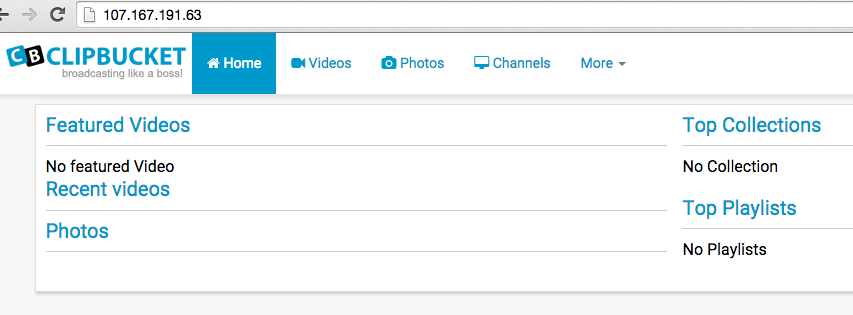
看到這一頁就表示全部完成了。最後,再把安裝檔案cb_install使用 sudo rm -rf cb_install刪除即可。接下來輸入網址就可以看到如下所示的主畫面了:
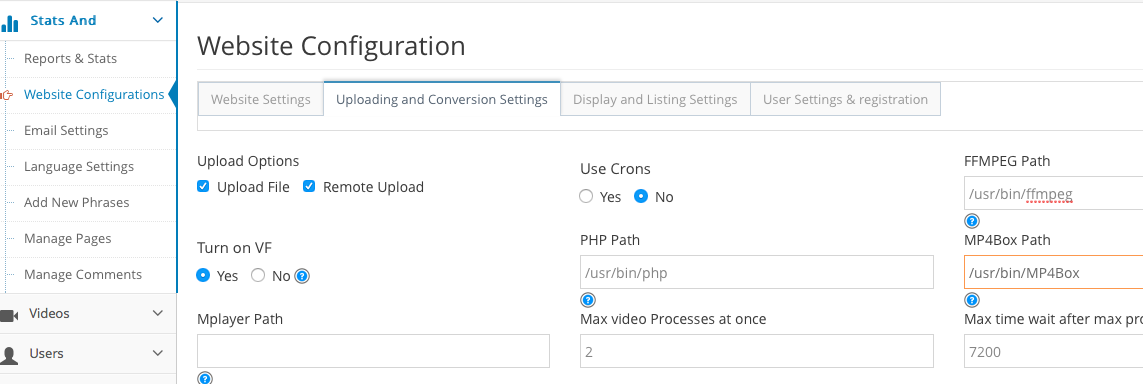
最後,為了確保上傳以及轉換影片可以順利完成,請參考以下的兩個畫面,先確定程式的路徑是正確的:
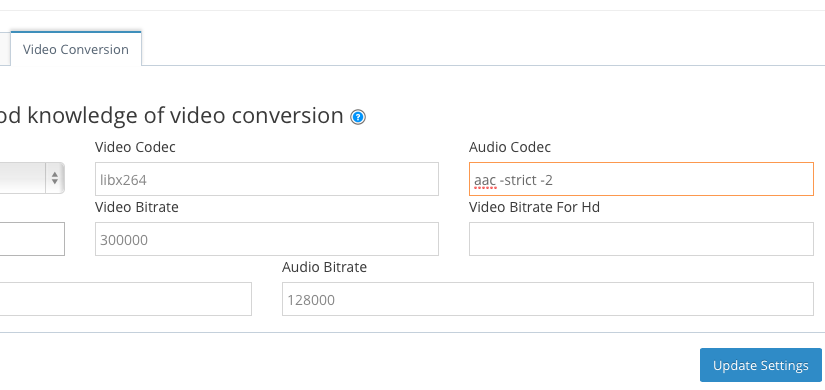
然後,聲音轉換的部份,也要改為aac才行:
以上這樣,就大功告成啦!對了,上傳影片再加上轉換的時間不會很快,所以通常都要等個10幾分鐘才會完成轉換,只要沒有出現錯誤訊息就可以再等等看喔。如果不確定的話,可以在ssh介面中使用top指令去看看行程運作的情形。小小的短片往往就要花上超過10分鐘,所以千萬不要想要把超過10分鐘的影片放上去,你會等上很久的。

你好,請問clipbucket上傳照片後會產生其他四個尺寸的檔案,但是我看檔案大小都一樣,請教有可能是哪裡出問題嗎?
拜讀了您使用google cloud 安裝ClipBucket,想請問一下你有遇過PHP CLI以在底層yum 確認有安裝但在Server Video Conversion Modules & Tools的PHP CLI會偵測不到,但我在VM安裝是OK的不知道您有遇到過這樣的狀況嗎?
沒有耶。
不過,我發現ClipBucket的處理效能實在是太差了,整個用起來其實不太划算。