micro:bit本身內建有藍牙模組,而幾乎所有的手機也都有藍牙的功能,因此使用手機來讀取micro:bit上的溫度資訊,只要透過藍牙協定就可以了。在前面單元中我個使用了現成的micro:bit Blue APP和micro:bit互動,其實我們也可以自己設計APP。在手機程式設計中,APP Inventor可以用簡單的方式很快地寫出具有讀取藍牙資訊能力的APP,本文就來教同學們如何做到。
在進行本單元的教學之前,一定要確定你的手機和micro:bit之間已經順利配對而且連線完成了,如果不太確定的話,簡單地說就是如果你能夠順利地完成上一單元的操作,在退出micro:bit Blue這支APP之後的狀態,就還是保持著藍牙之連線狀態的,請在這個情況下繼續進行下面的練習。
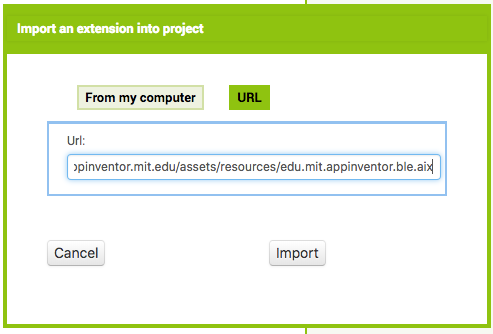
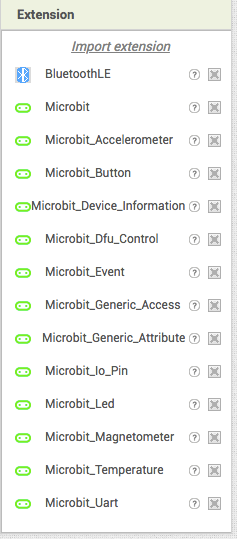
首先,在APP Inventor中預設是沒有開啟藍牙能力的,我們必須透過Extension功能匯入藍牙模組才行,首先是匯入BluetoothLE元件,請使用URL匯入方式,如下所示(網址是:http://iot.appinventor.mit.edu/assets/resources/edu.mit.appinventor.ble.aix):
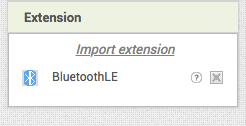
匯入之後即可在Extension之下看到BluetoothLE元件,如下所示:
接著要匯入micro:bit的相關操作模組,其網址:http://iot.appinventor.mit.edu/assets/com.bbc.microbit.profile.aix,匯入之後即可看到一大堆的micro:bit可用元件,如下所示:
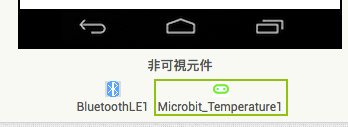
因為我們要讀取的是溫度的部份,所以請把Microbit_Temperature這個元件拉到手機的畫面中,就會在非可視元件區看到這個元件,同時也要把BluetoothLE元件也拉進來,如下所示:
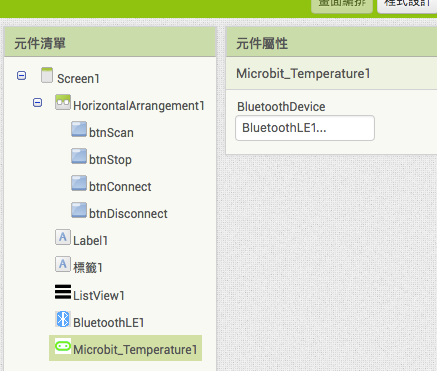
而Microbit_Temperature1的唯一屬性是要設定Bluetooth裝置,當然就是要填入BluetoothLE1,如下所示:
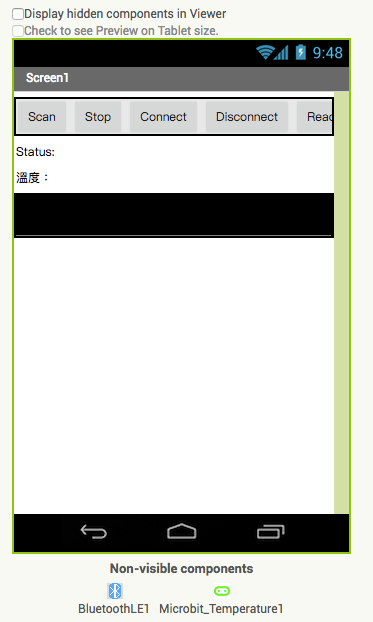
假設我們設計了以下的介面:
每個元件的值分別設定如下:
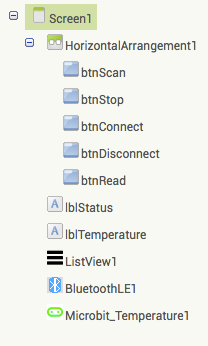
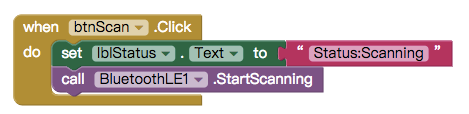
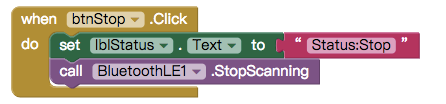
幾個按鈕分別是用來掃描以及停止掃描藍牙裝置,選擇想要連線的裝置進行連線以及停止連線,以及最後一個按鈕是用來讀取溫度的。掃描以及停止掃描的程式積木如下:
當開始執行掃描時,如果完成了之後會觸發一個找到裝置的事件,在此事件中,我們把所有找到的裝置清單放到清單元件中,如下所示:

這時候畫面上會出現所有找到的藍牙裝置之列表,此時我們可以在選擇其中一個裝置按下Connect按鈕,以下是Connect按鈕的程式積木:
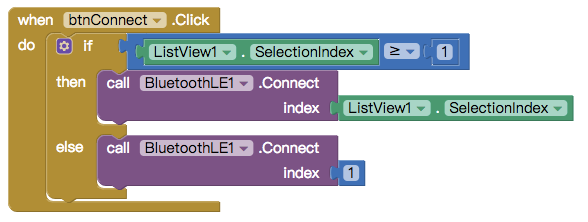
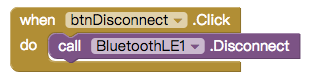
在此積木中我們先確定使用者是否真的有選擇了其中一個裝置,如果有的話就對該裝置進行連線的動作,如果沒有選擇的話,則預設是去連線第1個裝置。如果想要取消連線的話,則執行以下的積木:
在完成裝置的連線之後,系統會觸發一個連線成功的事件,在這個事件中要加上以下的程式碼:

這些程式主要的動作第一步在設定狀態訊息,而第二步則是設定讀取溫度的藍牙裝置,第三步是要求定期地更新溫度的資訊。而如果藍牙裝置在被取消連線的時候,也要更新一下訊息如下:

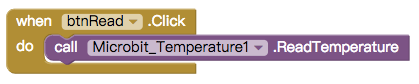
最後一個按鈕是用來主動讀取溫度的動作:
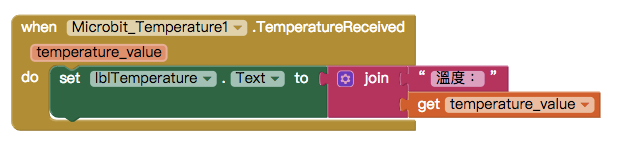
讀取到溫度之後,也會觸發一個讀取完畢的事件,這時候就要把它顯示出來:
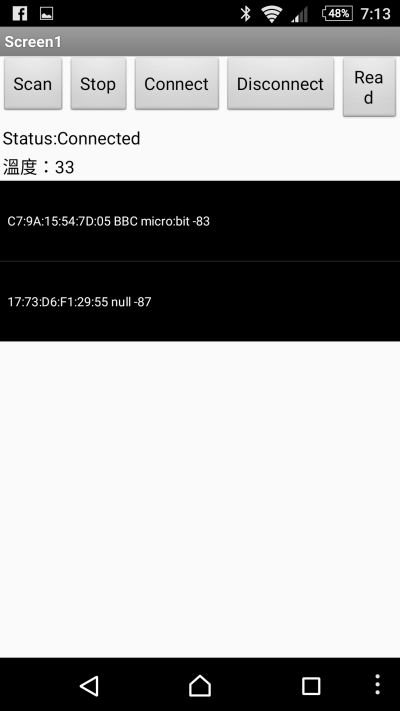
以下是Scan之後的畫面:
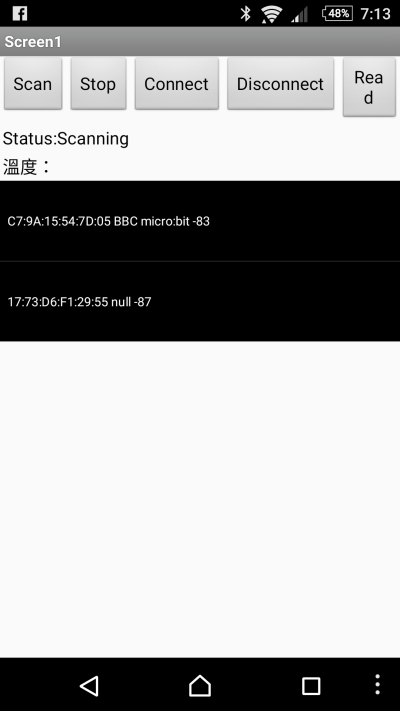
以下則是讀取到溫度的情形: